Thursday 10 December 2015

Games Art - Final Model

Here are screenshots of my final model in Unreal 4. I was unable to fully texture on the body due to an issue with Quixel, and not leaving enough time to resolve this issue.


Games Art - Creating Textures: Part 1

As I wanted to adhere as close as possible to the actual Boba Fett costume (Empire Strikes Back version), I have chosen to recreate the actual scratches that were painted onto the original props.


In order to do this, I would trace all the different layers of paint/weathering from various reference images, and then try and morph them into place on my own model's UVs.


After recreating masks of the front-left part of the helmet, I realised that this process would take an extremely long time, and it was also difficult to find reference at a high enough resolution for all parts of the model.


However, I had found the somebody online had already created an accurate template of every layer of paint on the helmet. If I was able to use this template, it would save a lot of time. I emailed the creator asking if I could use the templates 


Since he said yes, I then morphed his template to my own UV's. This meant I could use them as color IDs in Quixel.

Color IDs from Bandi Levante's Boba Fett helmet templates.


Here is a link to his forum post where I found the templates:


Games Art - Baking Maps: Part 2

For the body, I had to go through the same process as the helmet. I baked an ambient occlusion directly onto my automatic unwrapped high poly model, and then transferred them to my low poly as a diffuse texture and as separate pieces. The normal maps I baked as separate pieces as well.


Sunday 6 December 2015

Games Production - Milestone 4, Beta Build

This build has every gameplay element and UI scripted, as well as Razvan's environment/UI art and Steve's enemies and rigged/animated main character. I have also added some VFX elements such as particle effects and some fog effects.


Games Production - Milestone 3, Alpha Gameplay Prototype

This prototype has our main gameplay mechanics with Razvan's prototype art assets and level layout. I have scripted the power orb and the switches it activates. I have scripted the ground spikes that are activated by the player stepping on a pressure pad.

There are seven enemies placed around the map. You have to use traps in the environment or find the weapon in order to kill them.

Currently, I have not scripted the win condition. It will simply be finding the three keys in order to unlock the final door and escape the arena.


Games Production - Milestone 2, Early Gameplay Prototype

In order to try and understand how Unity's NavMesh system works, I created a basic scene in which I created a basic player controller and enemy controller.

In this scene, the player character (grey ball) moves to whatever point the player clicks on. If the enemies (green balls) have line of sight with the player, the enemies will move towards the player. If their line of sight with the player is obstructed, then they will move to whatever point they last line of sight with the player. They remain there until line of sight with the player is once again achieved.

When the enemies come within a short distance of you, then they enter an attack state. In this state, the enemies will turn a shade of red in order to signify to the player that they are attacking. If contact is made between an enemy and the player, then the player dies.


---------------------------------

I created another scene where the player has the opportunity to kill the enemy. The white cuboid levitating in the room next to the player is a sword. If contact is made between the player and an enemy whilst the weapon is held, then the enemy dies. 

Currently, the weapon can only be used once. The weapon drops to the floor once it has been used.


Monday 30 November 2015

Games Art - Baking Maps: Part 1

I have decided to create two separate texture sets for my model. One for the helmet and one for the body. This is so I don't have to work with a 8192x8192 Photoshop file that my computer wouldn't be able to handle. Even a 4096x4096 file nearly makes Photoshop crash on my computer, but editing two 4k textures is a lot more manageable than one 8k texture.

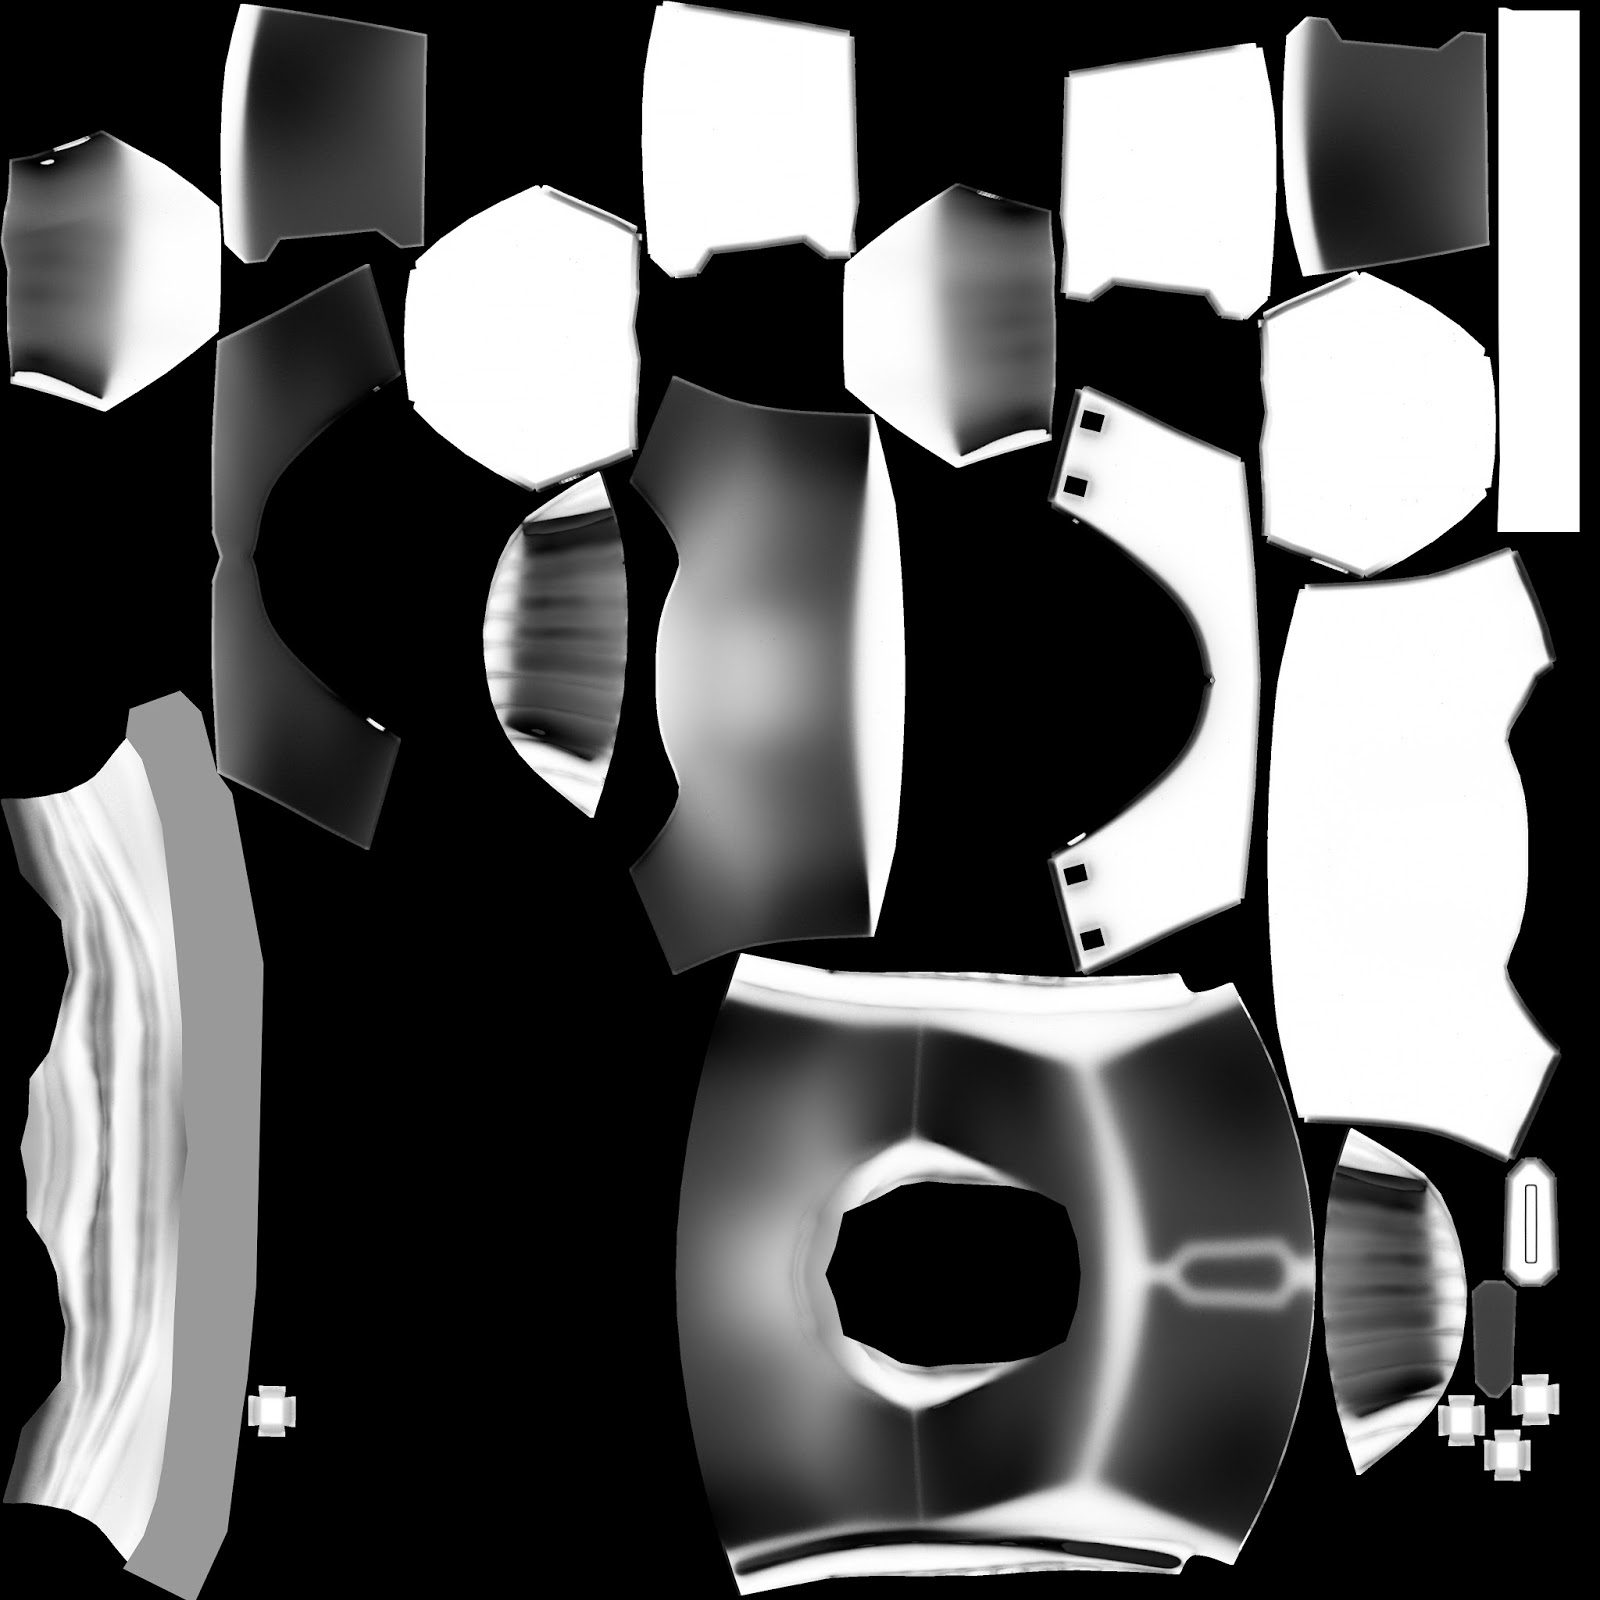
Currently, I have a fair amount of wasted texture space, which is mainly due to how I've unwrapped the bulk of the helmet (at the bottom). I could scale up the individual pieces to fill this space, but I would then have an inconsistent pixel density on my model. I also can't scale the pieces up uniformly without unwrapping the main bulk again with more seams, as it is already scaled as large as it can go (from edge to edge). I have chosen to keep this UV layout, and use some of the extra space for the body UVs if there are parts that can be easily separated.

I ran into a lot of issues trying to bake an ambient occlusion map. First was the issue of envelopes clipping and sampling an undesired surface. I was able to fix this on the normal map by doing each piece separately, but the ambient occlusion is reliant on the fact that all the pieces are done at the same and are in the correct positions. I needed the individual objects to occlude each other's ambient occlusion rays, but not the transfer rays from the envelopes to the target meshes. I solved this by baking an ambient occlusion directly onto my high poly model (using automatic UV unwrapping) and then transferring it to my low poly as a diffuse map. This meant I could each piece individually, as a diffuse transfer isn't dependent on each piece being done at the same time.


Monday 2 November 2015

Sunday 18 October 2015

Games Art - High Poly Asset: Part 1

For the high poly model I plan to make the majority of the shape in Maya, and then add the more organic elements in ZBrush (e.g., the bullet hole on the helmet, the folds in the clothing).


Below is the first 'iteration' I have created. It is the basic shape of the helmet. The proportions are still slightly inaccurate, there is no detail on the side panels and no smoothing.


First Iteration of the Helmet


Below is a slightly improved version. The dome of the helmet is a more accurate shape, and the whole model has been subdivided and smoothed. The side panels and antenna* are still only placeholder. The image was rendered with Mental Ray and has a three-point lighting setup.


Second Iteration of the Helmet


Below is the final version of the helmet I will continue to sculpt in ZBrush.


Final Helmet Model before ZBrush Sculpting


 *It's actually an 'External Targeting Rangefinder'. Since that's a lengthy term and most people mistake it for an antenna, I will simply refer to it as the 'antenna' for the purposes of this blog.

Games Art - AAA Game Asset


For this unit, we are tasked with modelling and texturing a AAA-quality game asset. I chose to create a Boba Fett bust similar to the one pictured below, as I believe the weathering on his helmet and armor will take advantage of a PBR texture setup.

Boba Fett bust


I have created a reference sheet that I can use in Maya to create the helmet. However, there are many different versions of Boba Fett's helmet with slight variations and I was unable to find perfect front side reference images, so I will not be following the reference exactly.

Helmet Reference Sheet

Tuesday 24 March 2015

Alley Scene with DirectX11 Shaders in Maya


Barrel without a Specular Map


Barrel with Specular Map

Frogman Work In Progess


Initial sketches in Photoshop


A quick paint of my first initial sketch


Sketch of my final Frogman.


A work in progress of my final Frogman.


How far I got with my final Frogman.