Link to comments.
Wednesday, 30 November 2016
80Shooter - Footage Feedback
This weekend I uploaded a short gameplay clip of our game to the Unity3D subreddit on Reddit, and it got quite a positive reception. It's worth taking this with a grain of salt though, as the Unity subreddit is followed by other developers. The game may be received differently by gamers who are unfamiliar with the process of game development.
Link to comments.
Link to comments.

Wednesday, 27 April 2016
Games Art Spring - Final Submission
This is my final scene in Unity. I have applied numerous image effects (such as screen space reflections, screen space ambient occlusion and Tonemapping and Color Grading), and utilized Unity's realtime Global Illumination.

Wednesday, 30 March 2016
Games Art Spring - Creating a Rock
To create a rock, I followed a useful tutorial I found on YouTube. The process starts by cutting sharp angles off of a cube in order to break up the uniformity of the cube and forming the general shape of the rock.


Then, using the Trim Adaptive brush and a square brush alpha, I trimmed the hard edges of the shape. Eventually, this process will begin to resemble erosion and weathering on the surface of the rock.

I also started adding small amounts of noise in order to make the detail more varied.


Games Art Spring - Creating a Tiling Stone Wall
In order to use a texture on a model with large surface area, I will need to create tiling texture so that I can retain detail whilst also not using up masses of memory of a giant texture.
I needed to create a stone wall for the pillars of the garage. To begin, I tried to find an image of a stone wall that resembled the stone wall in Syd Mead's concept image. The image below was the closest I could find.

Then, using this image as reference, I traced around the individual pieces of stone.

Then in order to make this seamless, I duplicated the image four times and manually matched up areas where the stone pieces didn't match up.

Before

After
Then, using the center quarter of this image, I imported it into ZBrush and used it as an alpha mask in order to elevate the stone areas of the texture. I then used ZBrush's surface noise in order to create more detail, and I then used the 'trim adaptive' brush in order to flatten certain areas, simulating weathering over time where the coarse surface has been smoothed by rain.
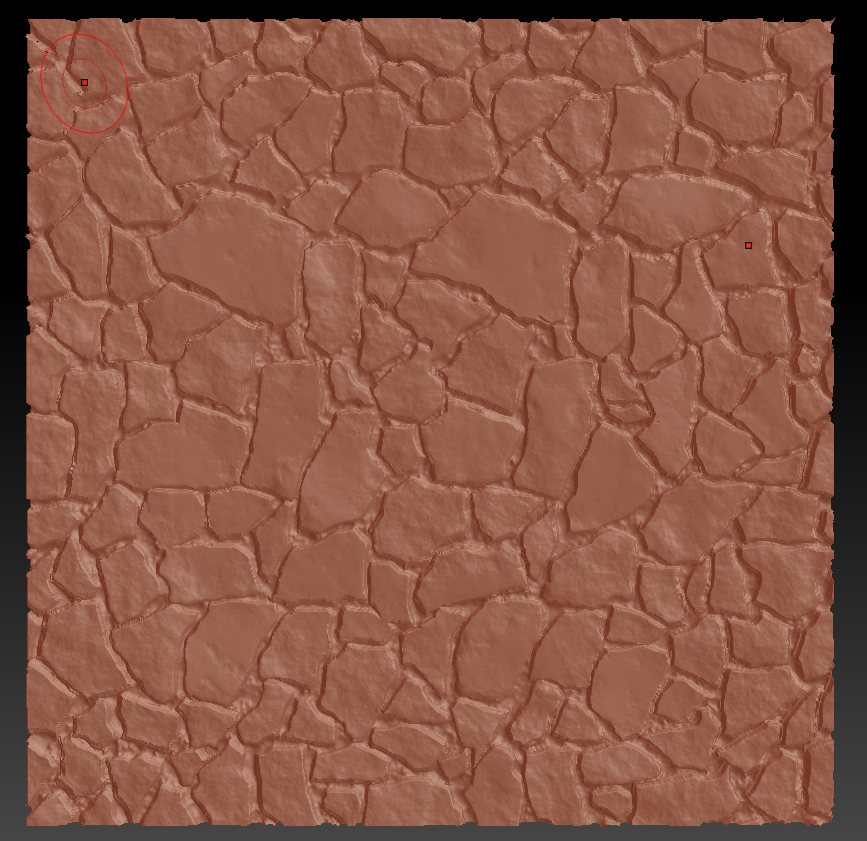
I could then use this high-poly mesh to create normal, ambient occlusion, height and cavity maps from.


Games Art Spring - Modelling the Bike
In order to get the correct shape of the bike, I first created a model where I only concerned my self with the shape, and ignored the topology (and polygon count). Since the Syd Mead piece of concept art was my only source of reference for this bike, I had difficulty recreating the profile of the bike whilst also trying to recreate the particular intricacies of the model. In particular, I found difficulty in making the corners at the top of the chassis flow into where they connect with the wheels.

After creating the general shape of the bike, I could then use this purely as a template for another model that would have correct topology. I using Maya's 'make live' feature, I could modeling over the top of the previous model with topology as my primary concern, and be ensured that the overall shape of the model would remain the same. I was also able to model the trim along the model and around lights, as well as other small bits of detail (such as the fuel tank cap, or indicator side-light). However, I wasn't able to model the circular bits of trim on the sides of the wheels, as the correct topology in order to create this was not available to me; I would have to tackle this later.

In order to get the circular trim on the sides of the wheels, I first created UVs for the wheel with a planar projection directly along the x-axis of the model. I could then use this projection to create a normal map using NDO whilst ensuring that the circle I create in Photoshop will remain perfectly circular on the side of the model.
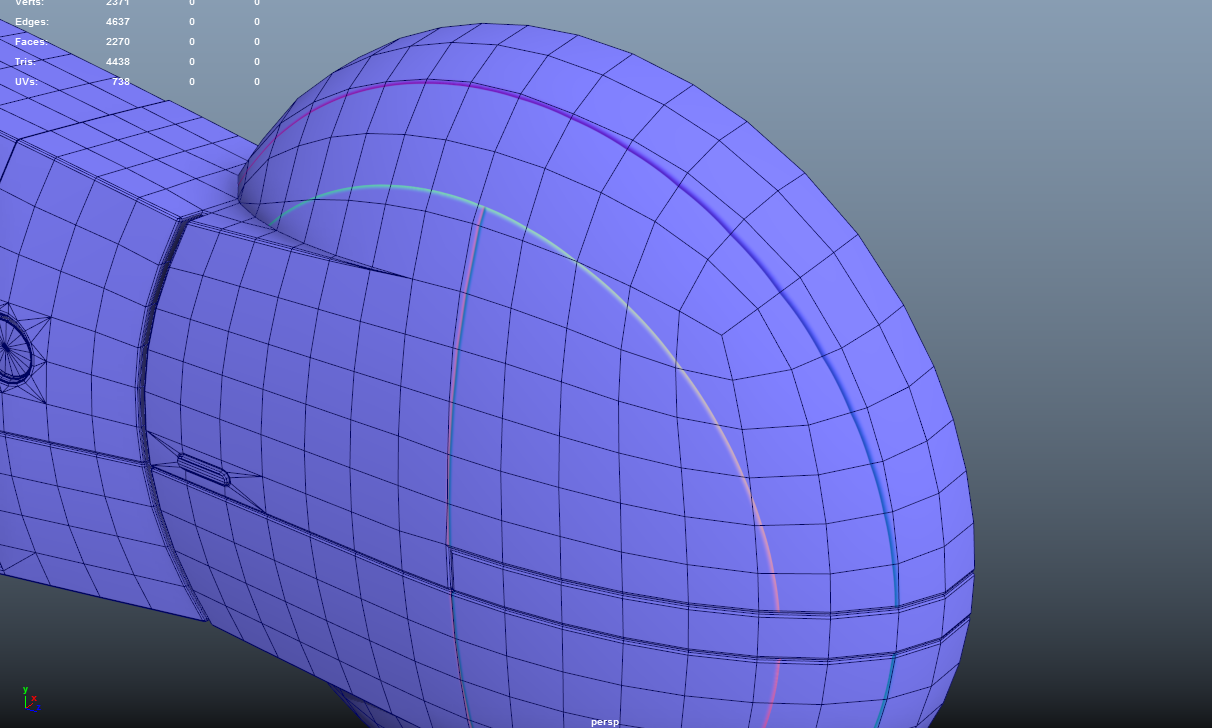
I then made a lower-poly version of the bike, as I would not need polygons for the in-cutting trim, as you cannot easily see their silhouette. Then, after baking my normals and ambient occlusion, I would need to combine them with the normals of the circular trim on the side of the wheels (Maya does offer an option to 'include materials' when transferring normals, but it seemed to only accept bump maps, not normal maps). Since they were a texture created in NDO and not geometry, I transferred them as a diffuse texture and them overlayed them on top of my baked normals in Photoshop.
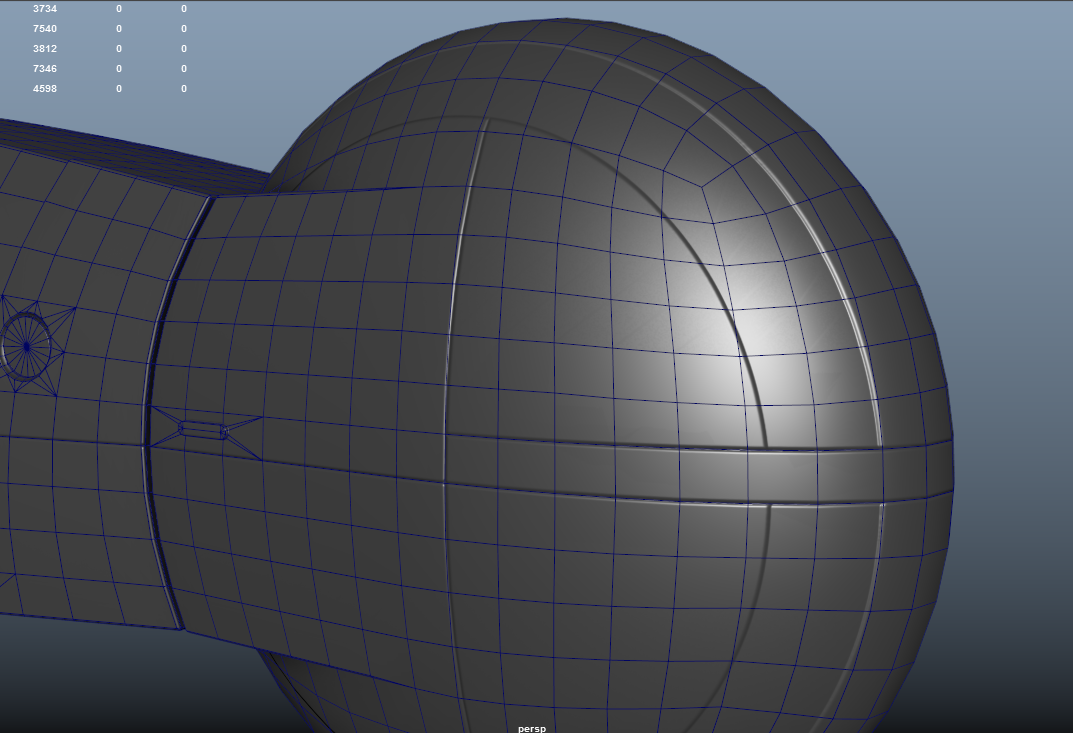
I then modeled the antenna of the bike, and the final model of the bike was complete.


Thursday, 21 January 2016
Games Art Spring - My Games Art Environment Scene
For my Games Art submission, I wish to try and recreate this piece of concept art (below) by Syd Mead. Syd Mead is a concept artist who also used to work as vehicle designer, so most of the shapes in his designs are geometrically possible. This should mean I will be able to recreate these objects whilst also retaining their appearance as they are in this image.
There are several features that the Unity game engine offers that I intend to leverage in order to create the same aesthetic in this image. Due to the reflective nature of a lot of the materials in this image, I plan to make use of Unity's reflection probes and the Screen Space Reflections Image Effect. I hope to use Unity's atmospheric scattering in order to create the lighting in the fog that can be seen on the right side of the mountain.
There are several features that the Unity game engine offers that I intend to leverage in order to create the same aesthetic in this image. Due to the reflective nature of a lot of the materials in this image, I plan to make use of Unity's reflection probes and the Screen Space Reflections Image Effect. I hope to use Unity's atmospheric scattering in order to create the lighting in the fog that can be seen on the right side of the mountain.
I plan on omitting the characters and car from the scene in order to make creating this scene achievable within the given timeframe.

Wednesday, 20 January 2016

Sunday, 3 January 2016
Games Production - Christmas Prototype
After submitting our Winter submission, I was eager to begin working on our next game for our Spring assignment. We had already decided on our team, and although we hadn't fully discussed what we wanted to make, I personally wanted to create a first-person shooter. Over the first week of the Christmas break, I created a small gameplay prototype to show to the rest of my team, and to begin figuring out if pursuing this idea would be possible with the specified time-frame.
The style of gameplay I was aiming to re-create is a style that can be found in 'old-school' shooters released in the 1990s such as Quake and Doom. Two gameplay aesthetics that typically characterize this style are a fast player movement speed, and an ability for the player to fire weapons accurately from the hip without aiming down sights. These two aesthetics were the main focus of this prototype.
I created a very small level for the player to move around in and some basic enemies that walk towards and shoot the player. Similarly to Unity's Standard Asset FPS Controller, the player movement is controlled by rotating and moving a capsule-shaped GameObject with a camera. However, instead of using a Character Controller component, I decided to use Unity's rigidbody physics in order to create a more natural feel for the movement.


Thursday, 10 December 2015
Games Art - Final Model
Here are screenshots of my final model in Unreal 4. I was unable to fully texture on the body due to an issue with Quixel, and not leaving enough time to resolve this issue.


Games Art - Creating Textures: Part 1
As I wanted to adhere as close as possible to the actual Boba Fett costume (Empire Strikes Back version), I have chosen to recreate the actual scratches that were painted onto the original props.
In order to do this, I would trace all the different layers of paint/weathering from various reference images, and then try and morph them into place on my own model's UVs.
After recreating masks of the front-left part of the helmet, I realised that this process would take an extremely long time, and it was also difficult to find reference at a high enough resolution for all parts of the model.
However, I had found the somebody online had already created an accurate template of every layer of paint on the helmet. If I was able to use this template, it would save a lot of time. I emailed the creator asking if I could use the templates

Since he said yes, I then morphed his template to my own UV's. This meant I could use them as color IDs in Quixel.
 |
| Color IDs from Bandi Levante's Boba Fett helmet templates. |
Here is a link to his forum post where I found the templates:
Games Art - Baking Maps: Part 2
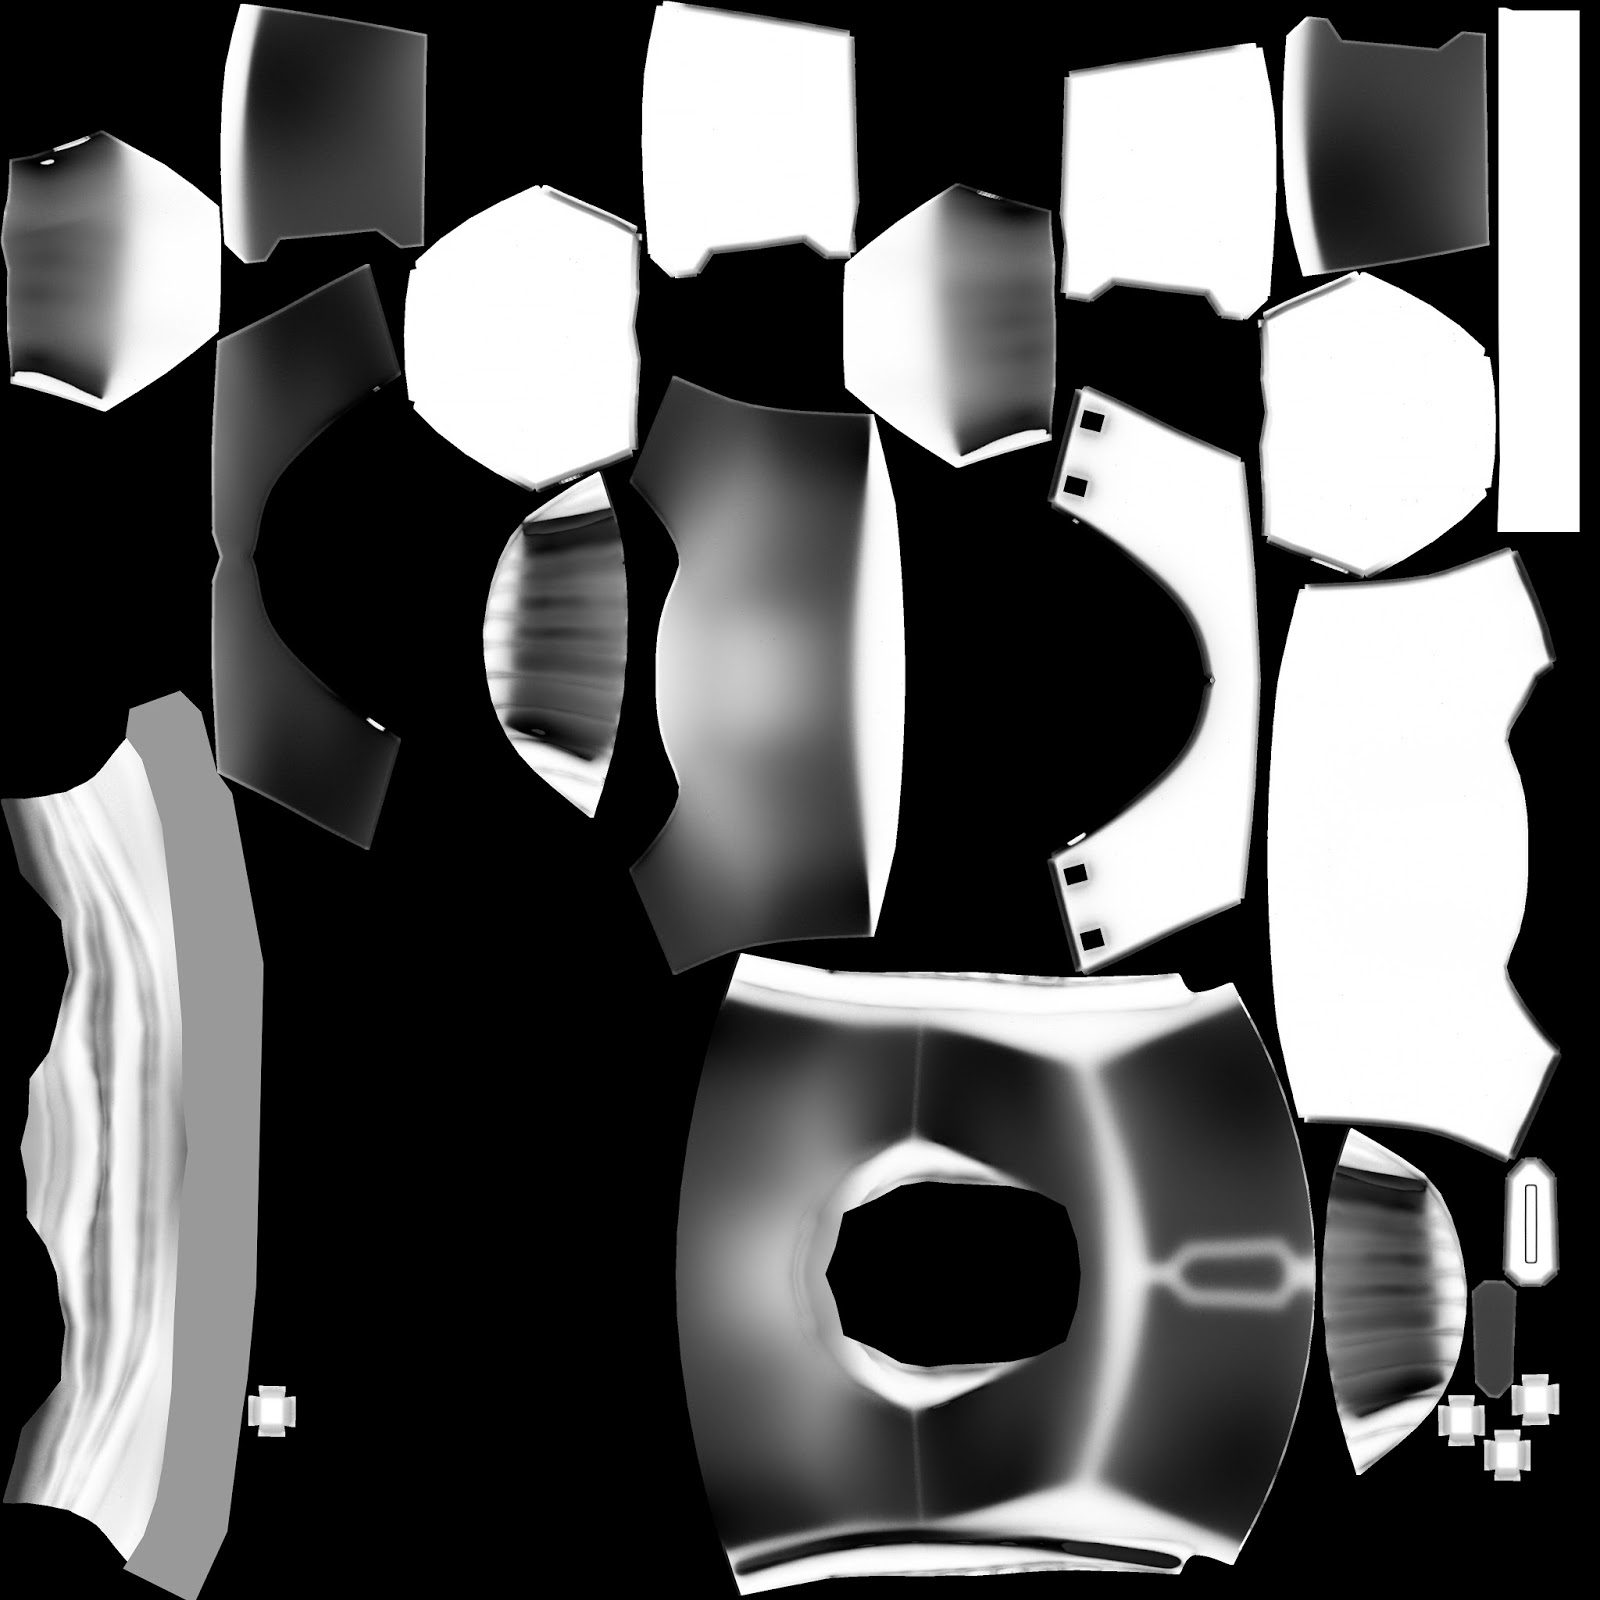
For the body, I had to go through the same process as the helmet. I baked an ambient occlusion directly onto my automatic unwrapped high poly model, and then transferred them to my low poly as a diffuse texture and as separate pieces. The normal maps I baked as separate pieces as well.

Sunday, 6 December 2015
Games Production - Milestone 4, Beta Build
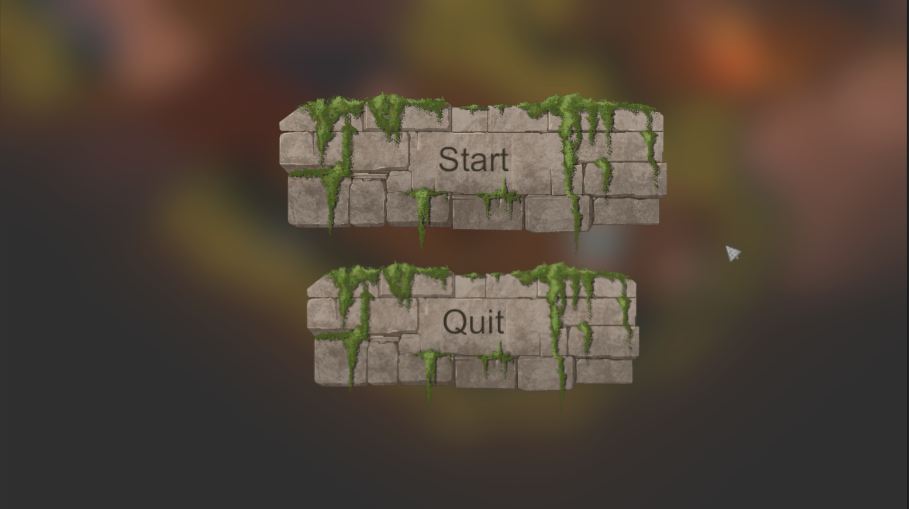
This build has every gameplay element and UI scripted, as well as Razvan's environment/UI art and Steve's enemies and rigged/animated main character. I have also added some VFX elements such as particle effects and some fog effects.


Games Production - Milestone 3, Alpha Gameplay Prototype
This prototype has our main gameplay mechanics with Razvan's prototype art assets and level layout. I have scripted the power orb and the switches it activates. I have scripted the ground spikes that are activated by the player stepping on a pressure pad.
There are seven enemies placed around the map. You have to use traps in the environment or find the weapon in order to kill them.
Currently, I have not scripted the win condition. It will simply be finding the three keys in order to unlock the final door and escape the arena.


Games Production - Milestone 2, Early Gameplay Prototype
In order to try and understand how Unity's NavMesh system works, I created a basic scene in which I created a basic player controller and enemy controller.
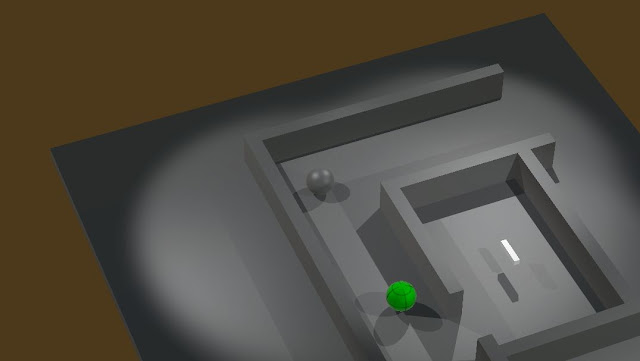
In this scene, the player character (grey ball) moves to whatever point the player clicks on. If the enemies (green balls) have line of sight with the player, the enemies will move towards the player. If their line of sight with the player is obstructed, then they will move to whatever point they last line of sight with the player. They remain there until line of sight with the player is once again achieved.
When the enemies come within a short distance of you, then they enter an attack state. In this state, the enemies will turn a shade of red in order to signify to the player that they are attacking. If contact is made between an enemy and the player, then the player dies.


---------------------------------
I created another scene where the player has the opportunity to kill the enemy. The white cuboid levitating in the room next to the player is a sword. If contact is made between the player and an enemy whilst the weapon is held, then the enemy dies.
Currently, the weapon can only be used once. The weapon drops to the floor once it has been used.
Currently, the weapon can only be used once. The weapon drops to the floor once it has been used.


Subscribe to:
Posts (Atom)